Solar Imaging & Sunspot AR2738
Solar Imaging is often forgotten in the world of astrophotography – in a hobby largely focused on the challenge of capturing dim night sky objects, we can easily forget that the brightest and most accessible object in the heavens is up literally all day. Unlike the night sky, the main challenge with capturing the sun is not that it requires long exposure, but that its intense light must be tamed to avoid damage to our eyes and cameras. Through the use of special filters, excess light from the sun can be rejected, allowing us to see one of the most extreme environments in our solar system close-up!

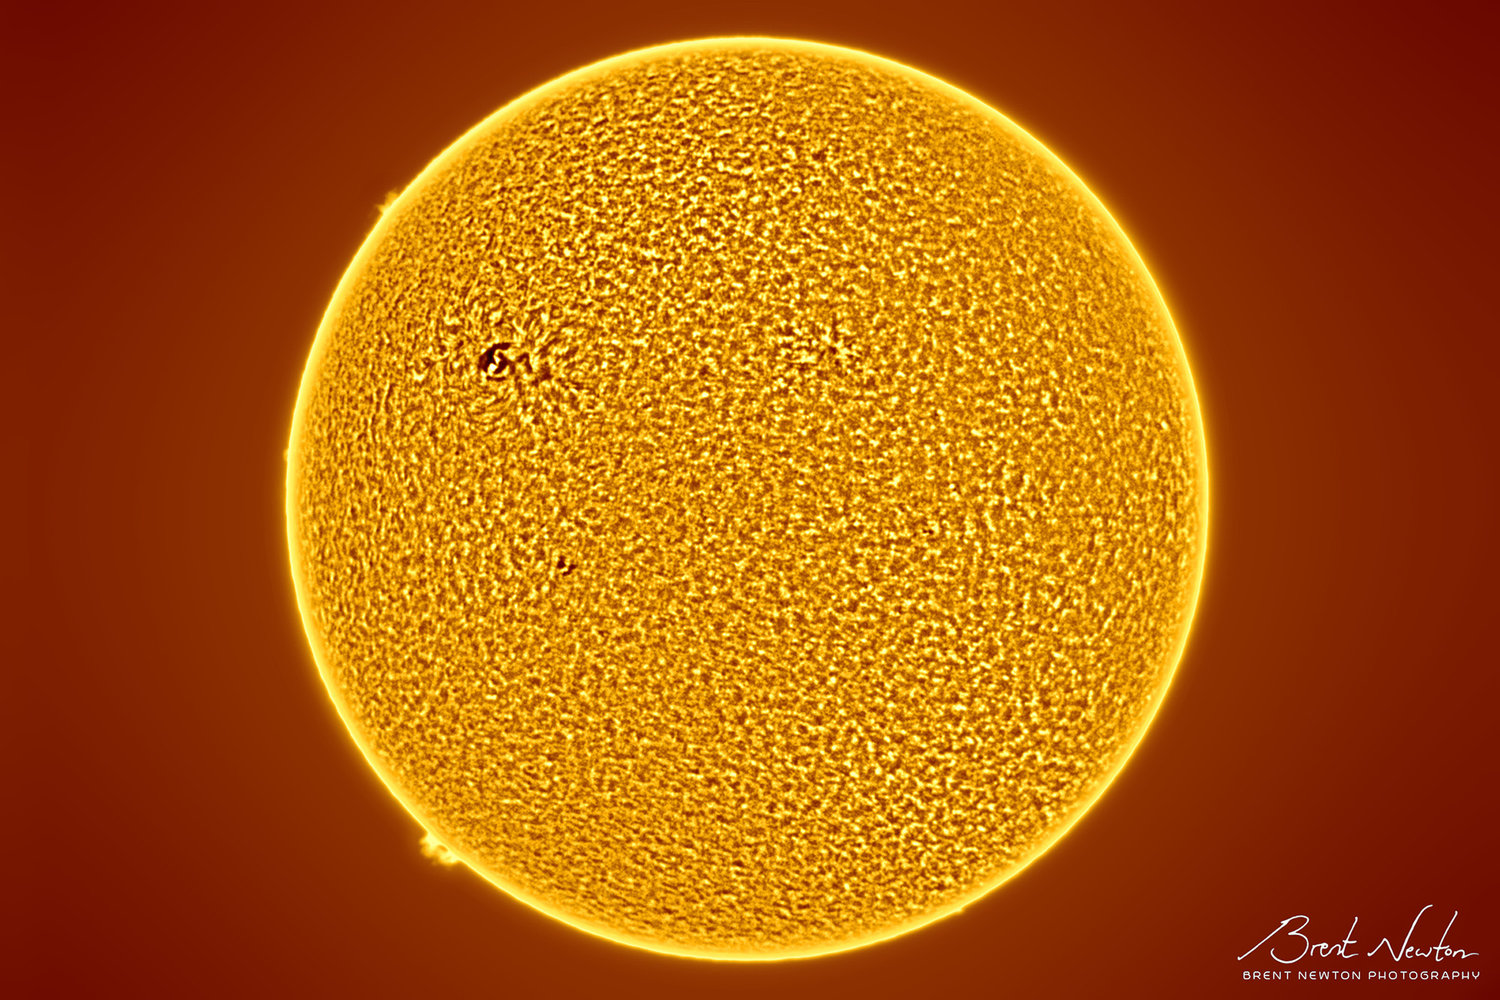
Sunspot AR2738 taken at 2000mm Focal Length

Sunspot AR2738 at 6000mm Focal Length
Details on this Object
This sunspot was about 3-4 times the diameter of Earth, at least at the time I captured it. Sunspots are regions of intense magnetic activity on the sun and can change in size and shape over the course of several hours. They appear darker because, due to magnetic activity, they are cooler than the rest of the sun’s surface – while most of the sun’s surface is a scorching 5600C, sunspots can be a much more pleasant 3500C. Some smaller spots can be seen around AR2738 and likely many more than what I could capture - sunspots can be a small as 16km wide, but these are invisible next to AR2738’s impressive ~50,000km diameter.
This sunspot also featured a small line (which was ~800km wide) across its center – this appeared for about 2 days, indicating the sunspot may have been in the process of splitting, before the line disappeared. The uneven background mottling is called granulation – each granule is a region of hot plasma rising or cooler plasma descending (which makes the edges of each granule). The smallest of these are around 1500km wide and they sometimes only last several minutes before disappearing.
Sunspots of sizeable proportions are currently rare. The sun is currently in what we call a Solar Minimum, meaning sunspot activity is near the low of an 11 year-long cycle. In the mid-2020’s the Sun will likely have more frequent sunspots of even larger sizes than this one, but for now I will take what I can get.
A Brief Overview of Solar Astrophotography
And a Warning, For Start
Astronomy is a fairly benign pursuit as far as danger and injury is concerned – except for some fairly persistent sleep deprivation, the worst we may ever deal with is frostbitten fingers on a cold night stargazing outdoors, but solar observing is a different game altogether. Most people understand you shouldn’t stare at the sun, and this is especially true when using a telescope. If I pointed my telescope at the sun and looked into the eyepiece, I would be immediately blinded in that eye faster than my brain could compel me to look away. Using proper filters, then, is of upmost importance – each time I set up for solar observing, I am attentive and mindful on applying the filter before the telescope is pointed anywhere upwards, and the filter is always checked for pinholes before and after every use.
Observing the Sun
We all know the sun is bright, but what can you see on the sun? Solar filters, depending on the specific nature of the filter and wavelength they target, can capture various layers of the sun’s atmosphere and “surface” (as much as a plasma ball can have a surface).

The Sun in visible White Light, Calcium-K, and Hydrogen-Alpha, taken by Pedro Ré
The filter I am using is a white light filter made from coated Mylar – this allows me to see the photosphere of the sun, which includes sunspots, faculae surrounding them (lighter/warmer transition regions), and the granulation of the sun’s “terrain.” The advantage of using this filter is mainly that it is cheap – this material can be bought by the sheet, cut to shape, and placed over the aperture of any backyard telescope, enabling you to view and photograph the sun with impunity.
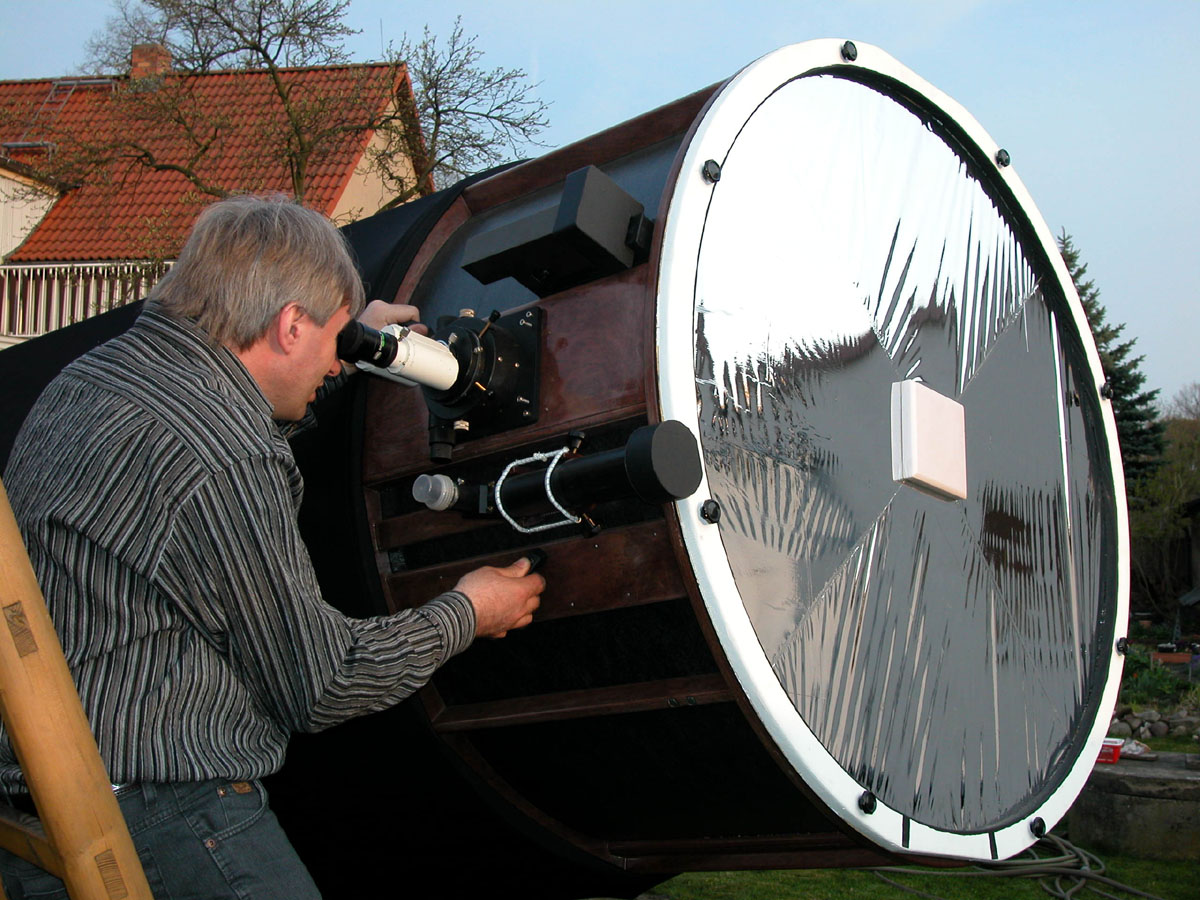
And I do mean any backyard telescope
Dedicated solar telescopes allow observation and photography of more interesting aspects of the sun. While white light filters reduce the sun to a grainy white-ish ball, narrowband solar telescopes reveal the sun to be a seething furnace of nuclear fire. Probably the most popular wavelength used by dedicated solar telescopes is Hydrogen-Alpha, which centers on a deep-red wavelength of 656nm. These specialized optics can show the “sexier” details on the sun such as prominences and filaments of ionized hydrogen which form the chromosphere (an area above the photosphere).
The Calcium-K line, shown in purple in the image above, displays a slightly cooler region using a wavelength near enough to UV that many people are unable to use these filters visually, instead relying on cameras to pick up the details missed by our limited organic eyes. Ca-K filters show large-scale surface features often associated with magnetic activity.
These dedicated solar telescopes can easily reach several thousand dollars for smaller models; in fact, many higher-end models rival the entire cost of my deep sky imaging setup – and as they are only useful for observing one object, it is not an expense I have so far pursued (but it is something I would like to further explore in the future). This is in part what makes solar astrophotography the oft-forgotten middle-child of photographing the “night sky;” while almost anyone with a camera can attempt to capture some stars (something even modern cell phones can accomplish with long-exposure camera apps), solar imaging can require the photographer to pursue expensive and specialized equipment before even attempting to take a photo.

My rather basic Solar setup
Shooting the Sun
Taking the actual photos of the sun is not too different from lunar or planetary imaging – you need the shortest (ideal) exposures possible for the best chance of capturing a sharp frame, and you need a lot of them. Fortunately, even after the filter is in place most cameras only require exposures of up to about one millisecond. For these images I used my ZWO ASI224MC; this is a dedicated planetary imaging camera which I have used in the past for planetary and lunar imaging to great effect, and it works well enough for solar too. A monochrome camera would offer better results but color cameras can still capture acceptable amounts of detail.
Both of my images started with a 5-minute video capture totaling 20,000 frames each. Special software is used to organize these frames by quality so that I can choose only the sharpest frames to stack. Despite the best efforts of Kansas air to distort each frame, choosing the sharpest 5% (1,000 by quantity) of these frames gave me a more than enough with which to work.
Processing in PixInsight & Photoshop
Most of the processing steps for these two images involved either sharpening various levels of detail or altering the light curve to enhance detail with greater contrast. These steps can be completed in Photoshop using a mixture of Unsharp Mask or Smart Sharpen and High Pass with Overlay blending at various pixel scales.
However, I have started to rely more on PixInsight for restoring detail with a process called Deconvolution. Unlike more common processes like Unsharp Mask, Deconvolution does not sharpen the detail in an image, it recovers detail by modeling a distorted star (as compared to a perfect star) and then applies the difference - the difference between the two may be subtle but it is important. After multiple passes of Deconvolution, I brought down the white point in order to bring greater contrast to the image before exporting it for further steps in Photoshop.
Finally, I get to add the color. Did I mention all the above steps are completed in greyscale? The filter I use is in part made with aluminum, which causes images of the sun to appear in a pale blue or off-white color. Before any deconvolution, I usually extract the black and white luminance from the color image which gives me the detail from all 3 color channels (note that if I had used a monochrome camera I could skip this step). Pale blue isn’t the color people expect to see from the sun anyway, so all I really care about until the last step is enhancing the detail.
Loading the image into Photoshop, I first change its mode back to RGB Color, then apply a custom color balance. This turns the sun from greyscale into what I call “honey yellow,” which is a beautiful golden-orange which is somewhat close to the images made from hydrogen-alpha solar telescopes.

Before and after coloration
Tips for Capturing your own Solar Images
As mentioned above, short exposures are your friend. The sun is what causes a lot of heat distortion to be present in our atmosphere, so using lucky imaging with short exposures is your best tool for capturing the sun in focus. If possible, capture the sun in the morning when the air is coolest.
Weather requirements for shooting the sun, at least in white light, tend to be more relaxed than the conditions for night sky imaging. Even thin cloud cover can result in acceptable images when using white light filters (both of my images here were shot in increasing haze, actually). This is not the case with hydrogen-alpha solar telescopes, however, as even thin haze can wipe out much of the detail and contrast shown by these tighter light bandwidths.
Waiting for the sunspot to be in the right place will also give you a better chance of capturing more detail. I was fortunate to have clear skies during a day when this spot was crossing the meridian of the sun, meaning it was facing almost directly towards us – as the sun rotates (every 14-26 days), these spots are not visible for more than a week or two, and they rarely last long enough to survive more than one rotation. By the time you are reading this, AR2738 has passed around the far side of the sun and has dissipated.
As for cameras, I have had good luck with both dedicated astronomy cameras as well as standard DSLRs. Even entry-level DSLR cameras are quite capable of capturing our closest star in detail; both of the images below actually used a Canon T3i.
High-speed video capture is usually the preferred method since you have more chances of capturing an in-focus frame. Fortunately, my ASI224MC, and many other planetary cameras sold by ZWO, is built with high-speed capture in mind. The closest comparative function offered by a DSLR is using video mode, which basically captures a stream of JPGs. Shooting in RAW offers little benefit here since, even with high-performance SD cards, the camera will only be able to take a 1-2 exposures per second, and as I process these images at first in black and white, choosing appropriate white balance has little meaning.

Sunspots AR2673 (upper middle) & 2674 (lower-right of 2673) from September of 2017, captured using a Canon T3i
The Sun and Sunspot AR2712, taken May 2018 with a friend’s 60mm Lunt Hydrogen-Alpha telescope and a Canon T3i
So How do You Know When Sunspots are Out?
Easy - check Spaceweather.com! This website displays daily images of the sun and any available sunspots as well as forecasts for Aurora, though I live far too south to typically be within range of capturing the Northern Lights. I usually check this website about once a week or if I see an increase in posted solar images on the various astrophotography forums in which I frequent.